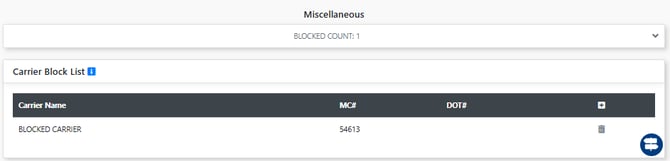
Selecting a section header will expand to display underlying fields
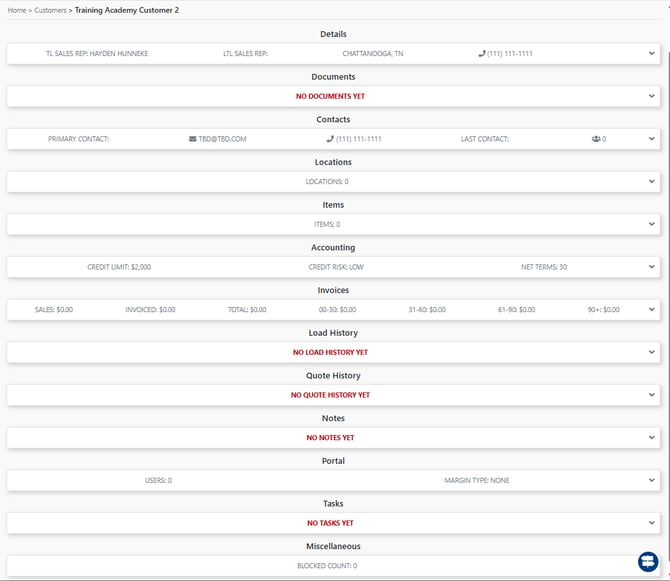
Breaking Down the 13 Sections
1. Details:
The details section houses all of the customer information. Open the Details section and click the edit button in any of the cards to add or update information.
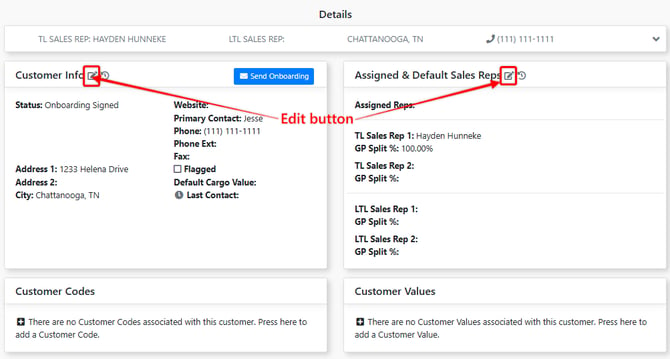
Customer Info - This card contains the main customer contact information
Assigned & Default Sales Reps - The default sales rep and associated split will automatically apply to each load built for the particular customer but can be edited during the load build process if needed. The default GP Split % will determine how much of the Gross Profit will be allocated to a certain Sales Rep on dashboards and reporting.
2. Documents:
Upload documents to a customers profile by selecting the [+] button > selecting the document type > browse and select the applicable file from your local storage.

3. Contacts:
Here is where you enter any of your contacts for the customer/company. (If you had contacts in the profile when this customer was a prospect, those contacts will transfer over when they become a customer.)
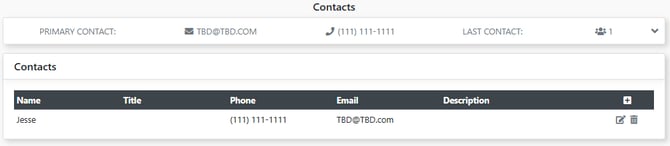
During certain processes such as load building you can select from saved contact records to auto populate the contacts information such as phone and email.
4. Locations:
Saved Customer Location records can be selected during the load build process to quickly auto populate the associated stop information.
Saved locations can be added 3 ways:
1. Add by clicking the [+] button in the locations tab in the customer profile
2. Add by downloading the template and uploading a locations list (use the download and upload icons in the card header)
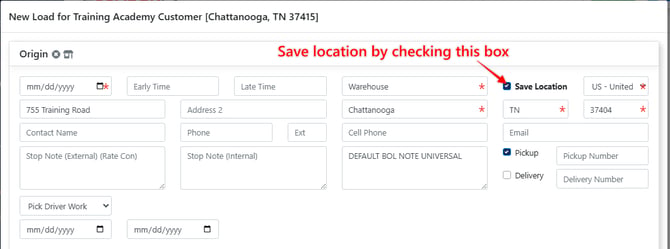
3. During the load build process (see below)

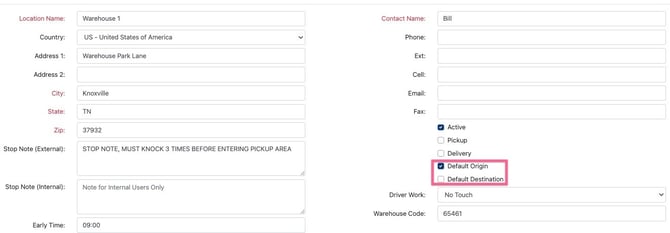
You can also create default locations for a customer
This will default the origin or destination when building a load for that customer.
Click the edit button on a location and check the "Default Origin/Destination" box then click save.
5. Items:
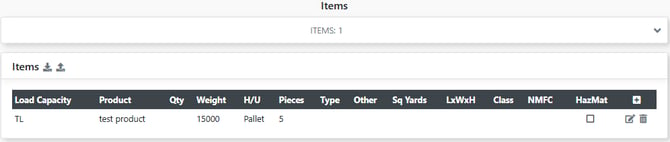
Saved Customer Item records can be selected during the load build process to quickly auto populate the associated Item information.
These items can be added 3 ways:
1. Add by clicking the [+] button in the items tab in the customer profile
2. Add by downloading the template and uploading a items list (use the download and upload icons in the card header)
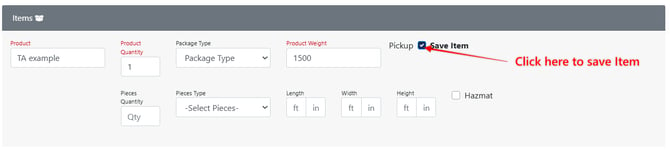
3. Saving an items from a load build (see below)
6. Accounting:
The customer’s accounting information can be found under this section.
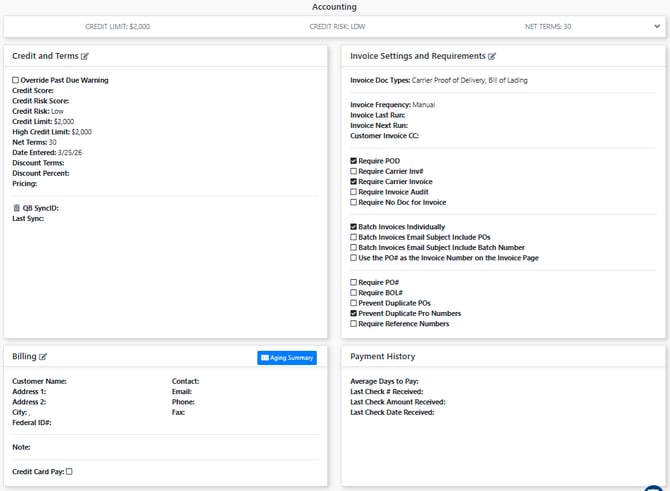
Credit and Terms
Set the customers credit limit, credit risk, terms, pricing, etc.
Invoice Settings and Requirements
This section includes the settings for invoicing preferences and requirements.
Click Here for more on Customer Invoice Settings and Requirements
Billing
Keep all of your customer's billing information in this section. When sending an invoice the email value entered here will auto populate into the invoice send window.
Payment History
This gives you an overview of the customer's payment history.
7. Invoices:
A basic breakdown of all invoices sent to a customer as well as their aging report.

8. Load History:
An overview (with links) to the loads that have been built for this customer. This also gives basic information like lane, date, profit and profit %.

9. Quote History:
Displays list of active and completed quotes for the customer.

10. Notes:
The Notes section has 2 main functions:
- Allow you to create default notes that are connected to other functions within the system and display by default (ex. BOL's).
- Allow you to record general notes and set tasks/follow up reminders (ex. Call note)
Default Notes
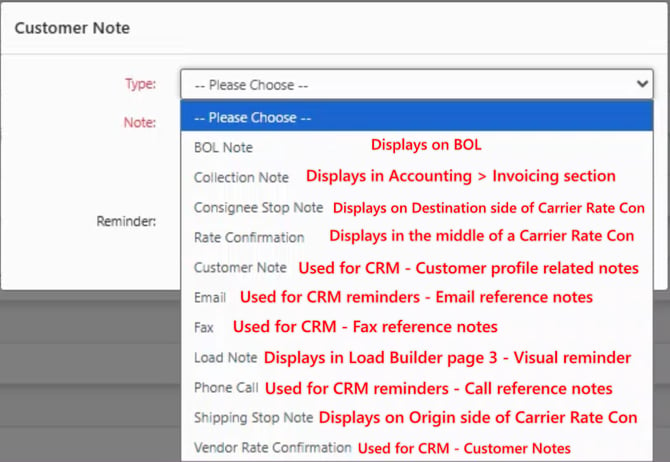
Before you enter a Note, you are required to categorize the note with a note Type. There are 11 note types as referenced by the screenshot below. You'll find a description beside each type in the screenshot detailing how each Note Type functions within the TMS.
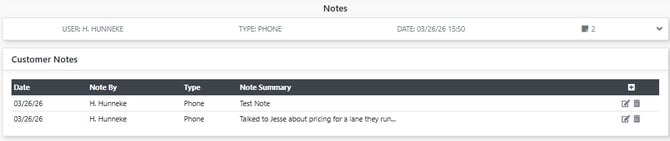
Below is a screenshot of a Customer profile with 2 notes categorized as a Phone note type. As seen in the screenshot above, these are notes taken during a phone call to remind you of what was discussed in the phone call.
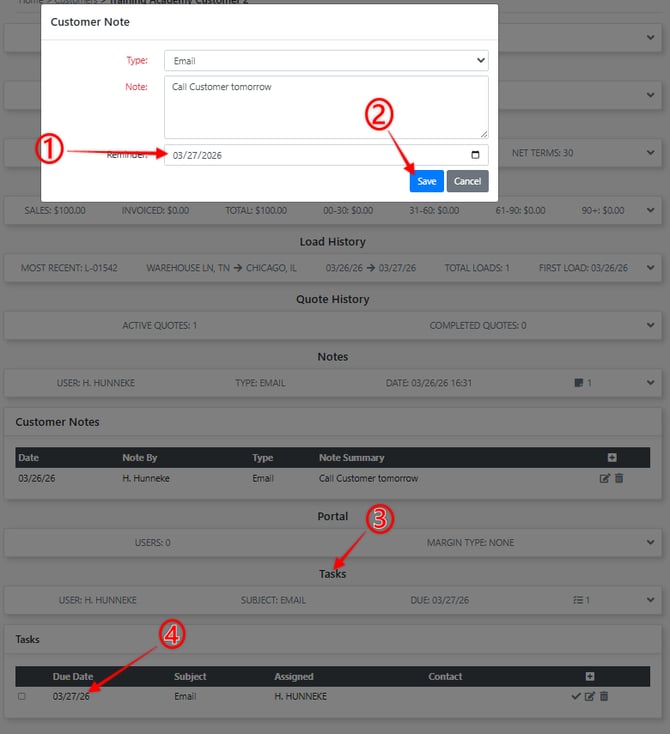
Reminders
If you select a Customer Note, Email, Fax, or Phone Call note type, you can add a Reminder date in the Date field to automatically create a Task. Tasks are located directly below the notes section in a Customer Profile.
11. Portal:
Customer Portal users can be added here. Create a unique login for your customer to have visibility to their loads.
Click here for more info on adding users to a customer portal
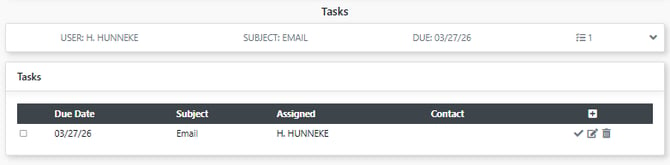
12. Tasks:
The tasks section allows you to create tasks and attach them to a customer profile. If a task is referenced to a particular customer it will show up in that customers profile under Tasks.
Click the link below to learn more about that Tasks feature
Click Here for more on the Task Queue
13. Miscellaneous:
Blocked Carriers can be added and viewed in this section.
Click Here for Additional Information on Carrier Block List