
Below you'll find a walkthrough describing how to record the receipt of your Customer Invoice and payment of your Carrier bill
*** If you utilize EZ TMS's Quickbooks Sync integration, the following tutorial described below will be automated for you! More Information regarding EZ TMS's Quickbooks sync can be found in the link below
Click Here for Syncing Customer Invoices to QBO
Click Here for Syncing Carrier Bills to QBO
Applying a Carrier Payment or Customer Invoice Receipt
-
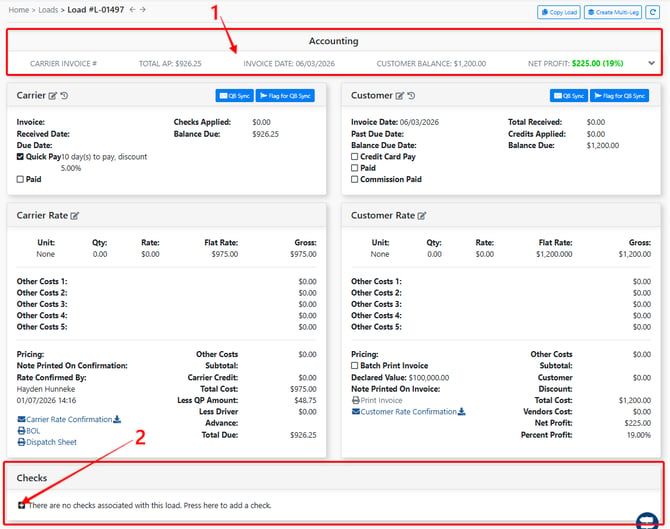
In the Load profile, select the Accounting section header to expand the section
-
Click the [ + ] icon to add a Check (i.e. Payment)
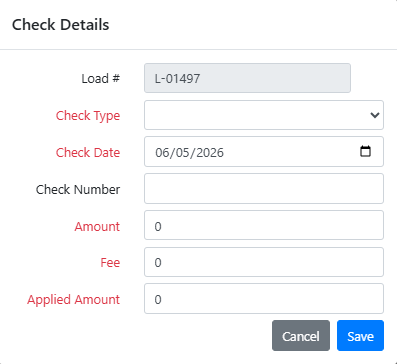
- Select the Check Type dropdown menu
- Enter the date of of Customer receipt or Carrier Payment
-
Enter the Check # (optional)
-
Enter the receipt amount
-
Enter the payment fee (Optional)
-
The applied amount will automatically input here.
-
Click [Save]
-
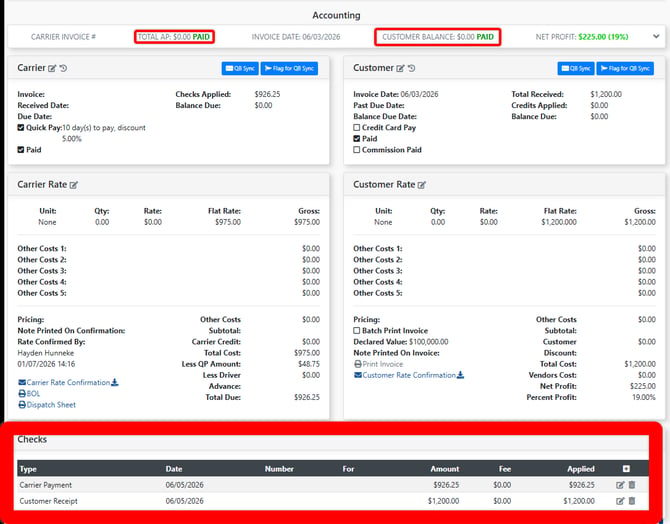
The Customer Receipt or Carrier Payment has been entered into the Load. It can then be edited or deleted utilizing the icons to the right. Notice the Accounting header displays a Customer Balance of $0.00 and will display a green PAID icon.
Check Management
Additonally, the Check Management feature allows users to bulk import Carrier Payments or Customer Receipts.
Click Here for Check Management Article
Completing a Load
- If you have processed payment on ONE side of the load, either the Customer receipt or Carrier payment, the Status of the Load will update to "Customer Paid or Carrier Paid", identifying that this load has been partially completed.
- If you have processed both Customer receipt and Carrier payment within the Load, the Status of the Load will move to "Completed", identifying that this load is now closed.